


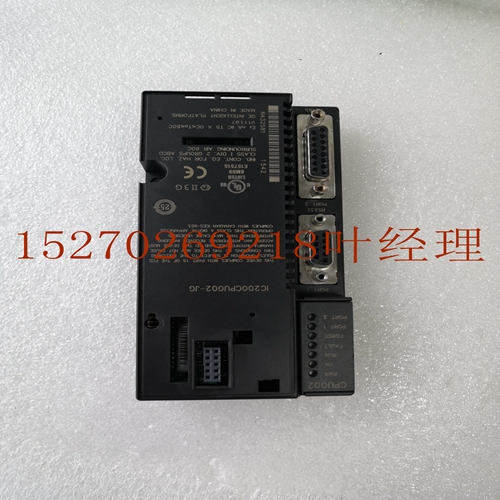
IS200TPROH1BBB模拟量输入模块
这通过提供良好的连续电缆屏蔽实现了最佳的抗干扰性,并且仍然允许引脚7(0V)sigl参考基板中的原点,而无需在任何工厂或定制电缆中移除引脚1。D超小型连接器外壳仍然与远程机架接地直流耦合。制作100%屏蔽电缆使用以下步骤构建100%屏蔽电缆:1。从定制电缆上剥去约5/8英寸的绝缘层,露出屏蔽层。2.从直接插入旧版本远程基板(IC693CHS393E、IC693CHS 399D或更早版本)的任何连接器上取下le Pin 1。3.将开口环套圈置于电缆绝缘层上(图10-17)。4.在电缆绝缘层和套圈的顶部折叠屏蔽层。5.将金属罩的套环放在折叠护罩的顶部,并牢牢夹住罩。6.测试电缆在两个连接器外壳之间的导通性。在外壳之间连接欧姆表,并在两端弯曲电缆。如果金属化的连接器罩与电缆屏蔽层的两端接触良好,则欧姆表上的连接将显示间歇性连续性。7.将金属带帽电缆插入远程底板扩展端口连接器或GE Fanuc WYE电缆,并牢固拧紧两个螺钉。安装和拧紧螺钉将使屏蔽与远程底板框架接地电气连接,远程底板框架应按照“安装”一章“底板安全接地”标题下的指示接地。“C C-8 Series 90-30 PLC I/O模块规格–2000 GFK-0898F接线图以下接线图显示了I/O扩展系统电缆的接线配置。提供了点对点电缆和Y形电缆的接线图。屏蔽排水销销25–销LE 25–销FELE金属外壳DIODT DIODT/DIOCLK DIOCLK/DRSEL DRSEL/DPRERR DPRERR/DRMRUN DRMRUN/DPFRAME DPFRAME/0V FGND 16 17 24 25 20 21 12 13 8 9 2 3 7 1当金属外壳连接器插入在一起时,粗体虚线显示连续(100%)屏蔽。TE:NC NC 16 17 24 25 20 21 12 13 8 2 3 7 1 DIODT DIODT/DIOCLK DIOCLK/DRSEL DRSEL/DPRERR DPRERR/DMRUN DRMRUN/DPFRAME DPFRAM/0V FGND 25–引脚FELE系列90–30基板扩展端口或Y形电缆双连接器端25–引脚LE金属外壳扭曲S,屏蔽(7 S)Y形电缆单连接器端45525图B-3。连续屏蔽定制长度电缆DFRAME屏蔽排水管16 17 24 25 20 21 12 13 8 9 2 3 7 1 16 24 25 20 12 13 8 2 3 3 7 1 a45527引脚DIODT DIODT/DIOCLK DIOCLK/DRSEL DRSEL/DRPERR DRPERR/DRMRUN DRMRUN/0V FGND DFRAME 25–引脚FELE Y形电缆单连接器端DFRAME/引脚系列90–30基板扩展端口或Y形电缆25–引脚LE 25–引脚25–引脚FELE DIODT DIODT/DIOCLK DIOCLK/DRSEL DRSEL/DRSER DRPERR/DRMRUN DRMRUN/0V FGND DFRAME/NC NC双绞线S,屏蔽(7 S)图B-4。要求低噪声抗扰度I/O电缆数据表C GFK-0898F附录C–I/O电缆数据单C-9在工厂DE WYE电缆或屏蔽排水管T连接电缆到下游机架或终端插头25–引脚LE金属化外壳16 DIODT FGND 1引脚25–引脚LE-金属化外壳25–引脚FELE金属化壳体引脚25引脚FELE当金属外壳连接器插在一起时,金属外壳(100%)屏蔽。IC693CHS399D(及其早期版本)图B-5。早期版本的远程基板自定义WYE电缆接线图te在远程基板IC693CHS393E(及更早版本)和IC693CHS 399D(及更早)中,有必要移除电缆插入基板的连接电缆的引脚1。这意味着当使用出厂的惠氏电缆IC693CBL300时,
This allows the best ise immunity by providing a good continuous cable shield, and still allows the pin 7 (0V) sigl reference to origite in the baseplate without the need for removing pin 1 in any factory or custom built cable. The D-subminiature connector shell is still DC coupled to the remote frame ground. king a 100% Shielded Cable Use the following steps to build a 100% shielded cable: 1. Strip approxitely 5/8 inch of insulation from your custom cable to expose the shield. 2. Remove the le Pin 1 from any connector plugging directly into an older version remote baseplate (IC693CHS393E, IC693CHS399D, or earlier). 3. Put split-ring ferrule over cable insulation (Figure 10-17). 4. Fold the shield back over top of the cable insulation and ferrule. 5. Place the collar of the metal hood over top of the folded shield and securely clamp the hood. 6. Test your cable for continuity between both connector shells. Connect an ohmmeter between the shells and flex the cable at both ends. If the metalized connector hood is t king proper contact with the cable shield at either end, the connection will show intermittent continuity on the ohmmeter. 7. Plug the metal hooded cable onto a remote baseplate expansion port connector or into a GE Fanuc WYE cable and securely tighten the two screws. Installing and tightening the screws will electrically connect the shield to the remote baseplate frame ground, which should in turn should be connected to earth ground as instructed in the “Installation” chapter, under the heading “Baseplate Safety Grounding.” C C-8 Series 90-30 PLC I/O Module Specifications – 2000 GFK-0898F Wiring Diagrams The following wiring diagrams show the wiring configuration for I/O expansion system cables. Wiring diagrams are provided for both point-to-point cables and Wye cables. SHIELD DRAIN PIN PIN 25–PIN LE 25–PIN FELE METALIZED SHELL DIODT DIODT/ DIOCLK DIOCLK/ DRSEL DRSEL/ DPRERR DPRERR/ DRMRUN DRMRUN/ DPFRAME DPFRAME/ 0V FGND 16 17 24 25 20 21 12 13 8 9 2 3 7 1 Bold dashed line shows continuous (100%) shielding when metallized shell connectors are plugged together. TE: NC NC 16 17 24 25 20 21 12 13 8 9 2 3 7 1 DIODT DIODT/ DIOCLK DIOCLK/ DRSEL DRSEL/ DPRERR DPRERR/ DRMRUN DRMRUN/ DPFRAME DPFRAME/ 0V FGND 25–PIN FELE SERIES 90–30 BASEPLATE EXPANSION PORT OR WYE CABLE DOUBLE CONNECTOR END 25–PIN LE METALIZED SHELL TWISTED S, SHIELDED (7 S) WYE CABLE SINGLE CONNECTOR END a45525 Figure B-3. Point-To-Point Cable Wiring for Continuous Shield Custom Length Cables DFRAME SHIELD DRAIN 16 17 24 25 20 21 12 13 8 9 2 3 7 1 16 17 24 25 20 21 12 13 8 9 2 3 7 1 a45527 PIN DIODT DIODT/ DIOCLK DIOCLK/ DRSEL DRSEL/ DRPERR DRPERR/ DRMRUN DRMRUN/ 0V FGND DFRAME 25–PIN FELE WYE CABLE SINGLE CONNECTOR END DFRAME/ PIN SERIES 90–30 BASEPLATE EXPANSION PORT OR WYE CABLE 25– PIN LE 25– PIN LE 25– PIN FELE DIODT DIODT/ DIOCLK DIOCLK/ DRSEL DRSEL/ DRPERR DRPERR/ DRMRUN DRMRUN/ 0V FGND DFRAME/ NC NC TWISTED S, SHIELDED (7 S) Figure B-4. Point-To-Point Cable Wiring Diagram for Applications Requiring Less ise Immunity I/O Cable Data Sheets C GFK-0898F Appendix C – I/O Cable Data Sheets C-9 CUT PIN 1 HERE IN FACTORY DE WYE CABLES OR SHIELD DRAIN T CONNECTED CABLE TO DOWNSTREAM RACK OR TERMITION PLUG 25–PIN LE Metallized Shell 16 DIODT FGND 1 PIN 25-PIN LE Metallized Shell 25–PIN FELE Metallized Shell PIN 25-PIN FELE Metallized Shell (100%) shielding when metallized shell connectors are plugged together. IC693CHS399D (AND EARLIER REVISIONS OF EACH) Figure B-5. Earlier Versions of Remote Baseplate Custom WYE Cable Wiring Diagram te In remote baseplates, IC693CHS393E (and earlier) and IC693CHS399D (and earlier), it is necessary to remove pin 1 of the ting cable where the cable plugs into the baseplate. This means that when using a factory de Wye cable, IC693CBL300,
")
")
")

