


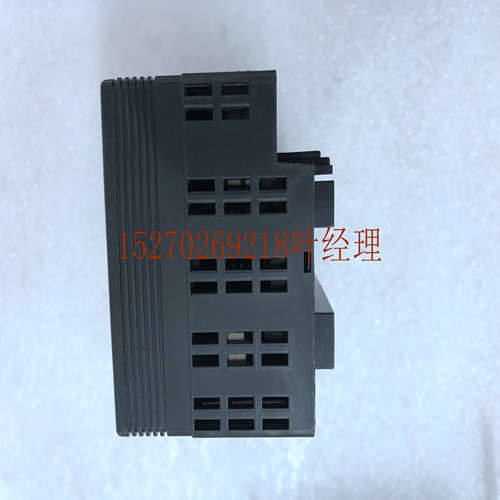
IS200VAICH1B工控自动化卡件
用于交流负载抑制的电阻器和电容器是标准组件,可从大多数电子产品分销商获得。直流负载系列90-30继电器COM直流电源1A,100V a4511A负载线圈现场接线信息下图提供了将用户提供的输入和负载设备以及电源连接到24伏输入/继电器模块的接线信息。90-30系列继电器~交流电源。图8-2。现场接线24输入/继电器模块-IC693MDR390 9节级1 1图双级1表_big级1 GFK-0898F 9-1第9章一般Alog模块信息本章介绍了Series 90-30可编程逻辑控制器的Alog输入和模块。为每个可用的Alog I/O模块提供了模块规格和接线信息。本章的第一部分描述了Series 90-30 PLC中如何处理模拟信息,随后描述了每个模块。特定模拟模块的具体信息可在该模块的描述中找到。下表(表3-1)列出了当前可用的Alog I/O模块,以及各模块描述的章节号。Alog I/O模块位置章节指南规格目录编号模块编号说明章节编号IC693ALG220 Alog输入,电压4第9章IC693ALGA221 Alog输入、GFK–0898F Alog模块功能Alog模块具有以下基本功能(请参阅下图):可拆卸端子板。如果需要,可以从模块上拆下端子板。然后,当您完成接线后,您可以轻松地将其重新安装到模块上。然而,有些人更喜欢在接线时将其留在模块上。如果您需要更换模块,如果您的旧端子板仍处于良好状态,则无需重新布线。只需从旧模块上拆下接线板,如果状态良好,将其安装在新模块上。端子板螺丝端子也是测试或故障排除时测量电压的方便点。铰链式前盖。盖子很容易打开,以接近端子板连接。对于rl操作,它保持关闭,以防止人员意外接触热白蚁。在下图中,前盖插件的背面包含接线板连接的示意图。模块目录号(本例中为IC693ALG391)印在前盖插件的底部。模块目录号也印在模块侧面的标签上。但是,为了看到该侧标签,必须从PLC中移除模块。在前盖插入件的前侧,是与模块的I/O点相对应的线。您可以暂时移除插件,并在适当的行上为每个点写下信号,以帮助测试或故障排除。此外,在前盖插件的前侧,在插件的左侧边缘垂直延伸,有一条彩色线标识模块类型:蓝色=DC,红色=AC,灰色=Alog。模块镜头盖。位于模块顶部前部,它覆盖LED(发光二极管)OK状态灯。该指示灯指示模块的基本状态。对于rl操作,OK LED应亮起。通用Alog模块信息部分9 GFK–0898F第9章–通用Alog组件信息部分JMPV2 DEF0 0–20**CH1*+–24V CH2 0–20**OPT。连接参见用户的NUAL可拆卸插入铰链盖图9-1。Alog I/O模块的90-30系列Alog电流模块负载要求示例下表
The resistor and capacitor shown for AC load suppression are standard components, ailable from most electronics distributors. DC LOADS SERIES 90-30 RELAY COM DC SUPPLY 1A, 100V a45151A Load Coil Field Wiring Infortion The following figure provides wiring infortion for connecting user supplied input and load devices, and power source(s) to the 24 Volt Input/Relay module. SERIES 90-30 RELAY ~ AC SOURCE . Figure 8-2. Field Wiring 24 Input/Relay Module - IC693MDR390 9 section level 1 1 figure bi level 1 table_big level 1 GFK-0898F 9-1 Chapter 9 General Alog Module Infortion This chapter describes the Alog Input and modules for the Series 90-30 Programble Logic Controller. Module specifications and wiring infortion are provided for each of the ailable Alog I/O modules. The first part of this chapter describes how alog infortion is handled in the Series 90-30 PLC, followed by a description of each of the modules. Specific infortion for a particular alog module can be found in the description of that module. Currently ailable Alog I/O modules are listed in the following table (Table 3-1) along with the chapter number where the description of each module can be found. Guide to Chapter Location for Alog I/O Module Specifications Catalog Number Description of Module Number of s Chapter Number IC693ALG220 Alog Input, Voltage 4 Chapter 9 IC693ALG221 Alog Input, GFK–0898F Alog Module Features Alog Modules have the following basic features (refer to the following figure): Removeable Termil Board. You can remove the termil board from the module in order to it, if desired. Then, when you are finished wiring it, you can easily reinstall it on the module. However, some prefer to leave it on the module when wiring. If you ever need to replace a module, you don’t have to do any rewiring if your old termil board is still in good condition. Simply remove the d termil board from the old module and install it on the new module if it is good condition. The termil board screw termils are also convenient points for measuring voltages while testing or troubleshooting. Hinged Front Cover. The cover is easily opened to access the termil board connections. For rl operation, it is kept closed to protect personnel from accidentally touching a hot termil. te in the following figure that the back side of the front cover insert contains a schetic diagram of the termil board connections. The module catalog number (IC693ALG391 in this example) is printed on the bottom of the front cover insert. The module catalog number is also printed on the label on the side of the module. However, in order to see this side label, the module has to be removed from the PLC On the front side of the front cover insert are lines that correspond to the module’s I/O points. You can temporarily remove the insert and write the sigl me for each point on the appropriate line to aid in testing or troubleshooting. Also on the front side of the front cover insert, running vertically on the left edge of the insert, is a colored line that identifies the type of module: Blue = DC, Red = AC, and Gray = Alog. Module Lens Cap. Located on the top front of the module, it covers the LED (Light Emitting Diode) OK status light. This light indicates the basic status of the module. For rl operation, the OK LED should be on. General Alog Module Infortion 9 GFK–0898F Chapter 9 – General Alog Module Infortion JMPV2 DEF0 0–20 * * CH1 * + – 24V CH2 0–20 * *OPT. CONN. SEE USER’S NUAL Removeable Insert Hinged Cover Figure 9-1. Example of Series 90-30 Alog Current Module Load Requirements for Alog I/O Modules The following table
")
")
")
")
")

