


IS215UCVDH5A工控模块
模块描述数字输入
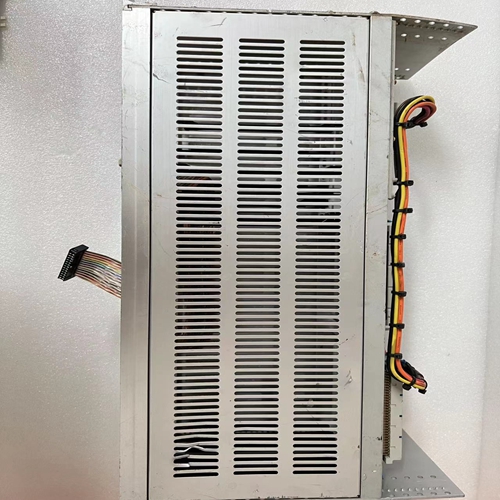
模块由占据模块安装单元(MMU)中一个插槽的单个印刷电路板组成。它监控两组独立的八个数字输入。12个输入彼此隔离;其余两对共用公共正输入线。模块面板上的两个固定螺钉将其固定至MMU。16个前面板LED状态指示灯(A组和B组)显示输入状态,并在系统测试和诊断中提供帮助。数字输入模块有三个用于外部信号和电源(P1、P2和P3)的卡边缘连接器。P1连接到公共(接地)和+5 VDC电源。P2将模块连接到I/O扩展器总线以与控制模块通信。P3使用连接到终端单元(TU)或终端模块(TM)的电缆输入数字信号。现场接线的接线板(物理连接点)位于TU/TM上。图1-1.INFI 90开放通信层通信高速公路(INFI-NET或工厂环路)控制道MFP TU/TM TU/TM TU/TM其他模块其他I/O模块I/O扩展总线通信模块T00083A IMCIS 2 IMDSI IMDSO简介说明内容WBPEEUI240752A0 1-3说明内容本说明分为八个部分和三个附录。在安装或操作IMDSI1数字输入模块之前,请阅读本说明。章节内容摘要如下:简介包含简要说明、一般使用信息和技术规格。
描述和操作使用
框图和示意图来解释模块操作和输入电路。安装包括安装模块和准备操作的初步步骤。它包括双列直插式开关和跳线设置、安装、接线连接、布线和操作前检查。操作程序提供有关前面板指示灯和启动程序的信息。故障排除解释错误指示的含义并包含故障排除步骤。维护包含计划的维护任务和程序。维修和更换程序包含说明如何更换模块的程序。支持服务解释Elsag Bailey向客户提供的服务和培训。附录A提供了NTDI01终端装置的配置信息。附录B提供了NIDI01终端模块的配置信息。附录C提供了开关和跳线位置和设置的快速参考。如何使用本手册在处理IMDSI1数字输入模块之前,请阅读本说明。如有需要,请参阅特定章节。1.安装模块前,请阅读操作程序部分。2.执行安装部分中的步骤。3.如果出现问题,请参阅故障排除部分以解决问题。4.有关定期维护要求,请参阅维护部分。简介文件惯例1-4 WBPEEUI240752A0®5。请参阅维修和更换程序以更换模块。6.使用支持服务部分了解有关订购备用模块和保修信息的信息。
Module Description Digital Input
The module consists of a single printed circuit board occupying a slot in the module mounting unit (MMU). It monitors two independent sets of eight digital inputs. The 12 inputs are isolated from each other; The other two pairs share a common positive input line. Two fixing screws on the module panel secure it to the MMU. The 16 front panel LED status indicators (Group A and Group B) display the input status and provide assistance in system testing and diagnostics. The Digital Input Module has three card edge connectors for external signals and power supplies (P1, P2, and P3). P1 is connected to a common (ground) and+5 VDC power supply. P2 connects the module to the I/O expander bus to communicate with the control module. P3 uses a cable connected to the terminal unit (TU) or terminal module (TM) to input digital signals. The terminal block (physical connection point) for field wiring is located on the TU/TM. Figure 1-1. INFI 90 Open Communication Layer Communication Expressway (INFI-NET or factory loop) Control Channel MFP TU/TM TU/TM TU/TM Other Modules Other I/O Modules I/O Expansion Bus Communication Module T00083A IMCIS 2 IMDSI IMDSO Introduction Description Content WBPEEUI240752A0 1-3 Description Content This description is divided into eight parts and three annexes. Please read this instruction before installing or operating the IMDSI1 digital input module. The contents of the chapters are summarized as follows: The introduction contains brief instructions, general usage information and technical specifications.
Description and operation
Block diagrams and schematics to explain module operation and input circuits. Installation includes the initial steps of installing the module and preparing for operation. It includes setting, installation, wiring connection, wiring and pre operation inspection of dual in-line switch and jumper. The operator program provides information about the front panel indicators and the startup program. Troubleshooting explains the meaning of error indications and includes troubleshooting steps. Maintenance includes planned maintenance tasks and procedures. The repair and replacement procedure contains a procedure that describes how to replace a module. Support services explain the services and training Elsag Bailey provides to customers. Appendix A provides the configuration information of NTDI01 terminal unit. Appendix B provides the configuration information of NIDI01 terminal module. Appendix C provides a quick reference to switch and jumper positions and settings. How to use this manual Please read this instruction before handling the IMDSI1 digital input module. Refer to specific sections if required. 1. Please read the operating procedures before installing the module. 2. Perform the steps in the Installation section. 3. If there is a problem, please refer to the troubleshooting section to solve the problem. 4. Refer to the maintenance section for regular maintenance requirements. Introduction Document Conventions 1-4 WBPEEUI240,752A0 ® 5。 Refer to the service and replacement procedure to replace the module. 6. Use the Support Services section for information on ordering spare modules and warranty information.
")
")
")
")

