


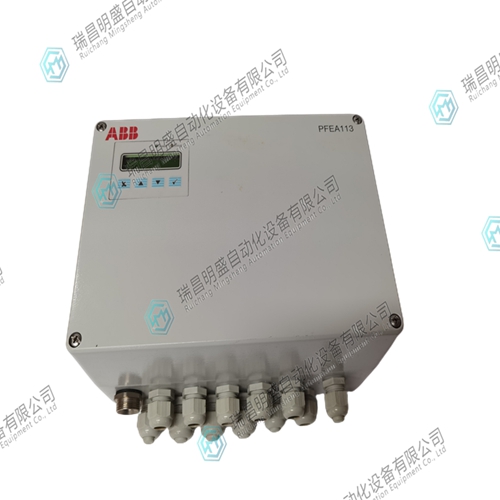
PFEA113-65张力传感器
绝缘放大器
PXUB 201绝缘放大器连接至张力电子设备电压输出。S1通常设置为电压比1:1。通过开关S1和S2选择输出以产生电压或电流输出。通过开关S2(位置3)选择响应较慢。开关位于装置内部。图3-17.绝缘放大器PXUB 201必须打开绝缘放大器才能设置开关S1和S2。1.从DIN导轨上卸下绝缘放大器。使用螺丝刀卸下绝缘放大器底部的弹簧。2.按下绝缘放大器两侧的弹簧锁。3.拉开顶盖,直到看到开关S1和S2。.设置开关S1与S2。5.将顶盖滑回锁定位置。6.将绝缘放大器重新安装在DIN导轨上。S2 1 2 3 ON S1 1 2 2 3 ON顶盖按扣锁松开按扣锁后,拉出顶盖。要释放弹簧锁张力电子器件PFEA111/112,用户手册第1节绝缘放大器PXUB 201 3BSE029380R0001 3-29图3-18。绝缘放大器的典型连接表3-5。设置输入和输出范围默认范围S1 S2输入输出1 2 3 1 2 3×0至±10 V 0至±10V×0至5 V 至20mA×0至10 V 至20 mA×0至5V 0至20 mA x 0±10 V±20 mA×表3-6。设置带宽默认带宽S2,位置3(×=开)×10 kHz 10 Hz×接地信号0 V+2 V 0 V+-+-+5 6 3 7 8信号0 V+2 V 0 V-+--+-5 6 3 7 8 PXUB 201–1 2 3 ON S1 2 3 ON S2 1 2 3 ON S1 2 2 3 ON S 2输出:至20 mA输入:0至10 V输出:0至±10 V输入:0到±10 V张力电子设备PFEA111/112,用户手册第3章调试3-30 3BSE029380R0001张力电子设备PFEA111/112,用户手册第.1节关于本章3BSE09380R0001 -1第章操作.1关于本章您的测量系统在正常操作期间不需要任何注意。只要系统打开,测量就会持续运行。但是,您需要知道如何启动和关闭系统,请参见第.节启动和关闭。.2安全说明在开始任何操作工作之前,阅读并遵循第1章“简介”中给出的安全说明。然而,如果地方法规更严格,则应优先考虑。.3操作装置LED指示灯和操作键如图-1所示。电源状态背光LCD显示后退后退后退正常(确认)LED“电源”LED“状态”或取消张力电子设备PFEA111/112,用户手册第章操作 3BSE029380R0001 .启动和关闭..1启动使用外部ON/OFF开关(非ABB提供)启动和关闭张力电子设备。
在正常维修期间
不需要操作员采取任何措施。1.检查主张力控制机械是否准备好正常运行。2.通过将外部on/OFF开关设置为on位置来打开张力电子设备。对于IP 65版本(NEMA ),也将内部开关设置为“on”。3.检查:-显示器亮起-“电源”指示灯亮起-状态指示灯亮(绿灯)。红灯表示错误。..2关闭通过将外部ON/OFF开关设置为OFF位置关闭张力电子设备。.5正常运行测量设备应永久打开以获得最佳测量结果。这允许称重传感器和电子设备在均匀的温度条件下工作。测量设备设计用于连续工作。电源状态“电源”指示器显示“状态”指示器张力电子设备PFEA111/112,用户手册第.6节操作员菜单3BSE029380R0001 -3 .6操作员菜单本节描述了操作员菜单。显示值的更新时间为500毫秒。使用和在菜单之间切换。图。操作员菜单.6.1卷筒纸张力.6.1.1标准卷筒(两个测压元件)当一个标准卷筒(二个测压传感器)连接到张力电子设备时,以下菜单可用:•卷筒纸张力显示由测压元件a和测压元件B测得的总卷筒纸张力•张力a显示由测重元件a测得的卷筒纸张力部分•张力B显示由载荷测得的部分卷筒纸张力单元B•张力差A-B显示张力A和张力B之间的差异.6.1.2单侧测量(一个称重传感器)当只有一个称重元件(单侧测量)连接到张力电子设备时,会显示以下菜单:•单侧测量时会显示卷筒纸张力(仅连接称重元件A)。卷筒纸张力是由测压元件A测量的张力乘以2。
Insulated amplifier
The PXUB 201 insulation amplifier is connected to the voltage output of the tension electronics. S1 is usually set to a voltage ratio of 1:1. Output is selected through switches S1 and S2 to generate voltage or current output. Slow response is selected by switch S2 (position 3). The switch is located inside the unit. Figure 3-17. Insulating amplifier PXUB 201 must be turned on to set switches S1 and S2. 1. Remove the insulation amplifier from the DIN rail. Use a screwdriver to remove the spring at the bottom of the insulation amplifier. 2. Press the spring locks on both sides of the insulation amplifier. 3. Pull off the top cover until you see switches S1 and S2 Set switches S1 and S2. 5. Slide the top cover back to the locked position. 6. Reinstall the insulation amplifier on the DIN rail. S2 1 2 3 ON S1 1 2 2 3 ON top cover snap lock Release the snap lock and pull out the top cover. To release the spring lock tension electronic device PFEA111/112, section 1 of the user manual insulation amplifier PXUB 201 3BSE029380R0001 3-29 Figure 3-18. Typical connections of insulated amplifiers are shown in Table 3-5. Set input and output range Default range S1 S2 I/O 1 2 3 1 2 3 × 0 to ± 10 V 0 to ± 10 V × 0 to 5 V to 20 mA × 0 to 10 V to 20 mA × 0 to 5V 0 to 20 mA x 0 ± 10 V ± 20 mA × Table 3-6. Set bandwidth default bandwidth S2, position 3( ×= ON) × 10 kHz 10 Hz × Ground signal 0 V+2 V 0 V+-+-+5 6 3 7 8 signal 0 V+2 V 0 V -+--+- 5 6 3 7 8 PXUB 201 – 1 2 3 ON S1 2 3 ON S2 1 2 3 ON S1 2 3 ON S 2 Output: to 20 mA Input: 0 to 10 V Output: 0 to ± 10 V Input: 0 to ± 10 V Tension electronic equipment PFEA111/112, Chapter 3 of the User's Manual Commissioning 3-30 3BSE029,380R0001 Tension electronic equipment PFEA111/112, Chapter 3 of the User's Manual 1 Section 3BSE09380R0001 - 1 Operation of this chapter 1 About this chapter, your measuring system does not need any attention during normal operation. As long as the system is turned on, the measurement will continue to run. However, you need to know how to start and shut down the system, see section. Starting and shutting down 2 Safety instructions Before starting any operation, read and follow the safety instructions given in Chapter 1 "Introduction". However, if local regulations are more stringent, priority should be given 3 The LED indicator and operation keys of the operating device are shown in Figure 1. The power status backlight LCD displays the backward backward normal (confirm) LED "power" LED "status" or cancels the tension electronic device PFEA111/112. Chapter Operation 3BSE029380R0001 in the User's Manual. Start and close.. 1 Start Use the external ON/OFF switch (not provided by ABB) to start and close the tension electronic device.
During normal maintenance
No action by the operator is required. 1. Check whether the main tension control machine is ready for normal operation. 2. Turn on the tension electronics by setting the external on/OFF switch to the on position. For IP 65 version (NEMA), also set the internal switch to "on". 3. Check: - The display is on - The "Power" indicator is on - The status indicator is on (green). A red light indicates an error 2 OFF Turn off the tension electronics by setting the external ON/OFF switch to the OFF position 5 The measuring equipment in normal operation shall be permanently opened to obtain the best measurement results. This allows load cells and electronics to operate at uniform temperature conditions. The measuring equipment is designed for continuous operation. Power status "Power" indicator displays "Status" indicator Tension Electronics PFEA111/112, User's Manual, para Section 6 Operator Menu 3BSE029380R0001 - 3.6 Operator Menu This section describes the operator menu. The display value is updated in 500 milliseconds. Use and to switch between menus. Figure. Operator Menu 6.1 Web Tension 6.1.1 Standard Web (two load cells) When a standard Web (two load cells) is connected to the tension electronics, The following menus are available: • Web tension shows the total web paper force measured by load cell a and load cell B • Tension a shows the part of web paper force measured by load cell a • Tension B shows the part of web paper tension unit measured by load B • Tension difference A-B shows the difference between tension A and tension B. 6.1.2 When there is only one weighing cell (single side measurement) When connected to the tension electronics, the following menu is displayed: • The web tension is displayed when measuring on one side (only weighing cell A is connected). Web tension is the tension measured by load cell A multiplied by 2.
")
")
")

